Configuration Transfer
The Configuration Transfer page lets you export your system configuration as a portable JSON file and import it into another environment. It is designed for promoting configuration from development to staging to production.
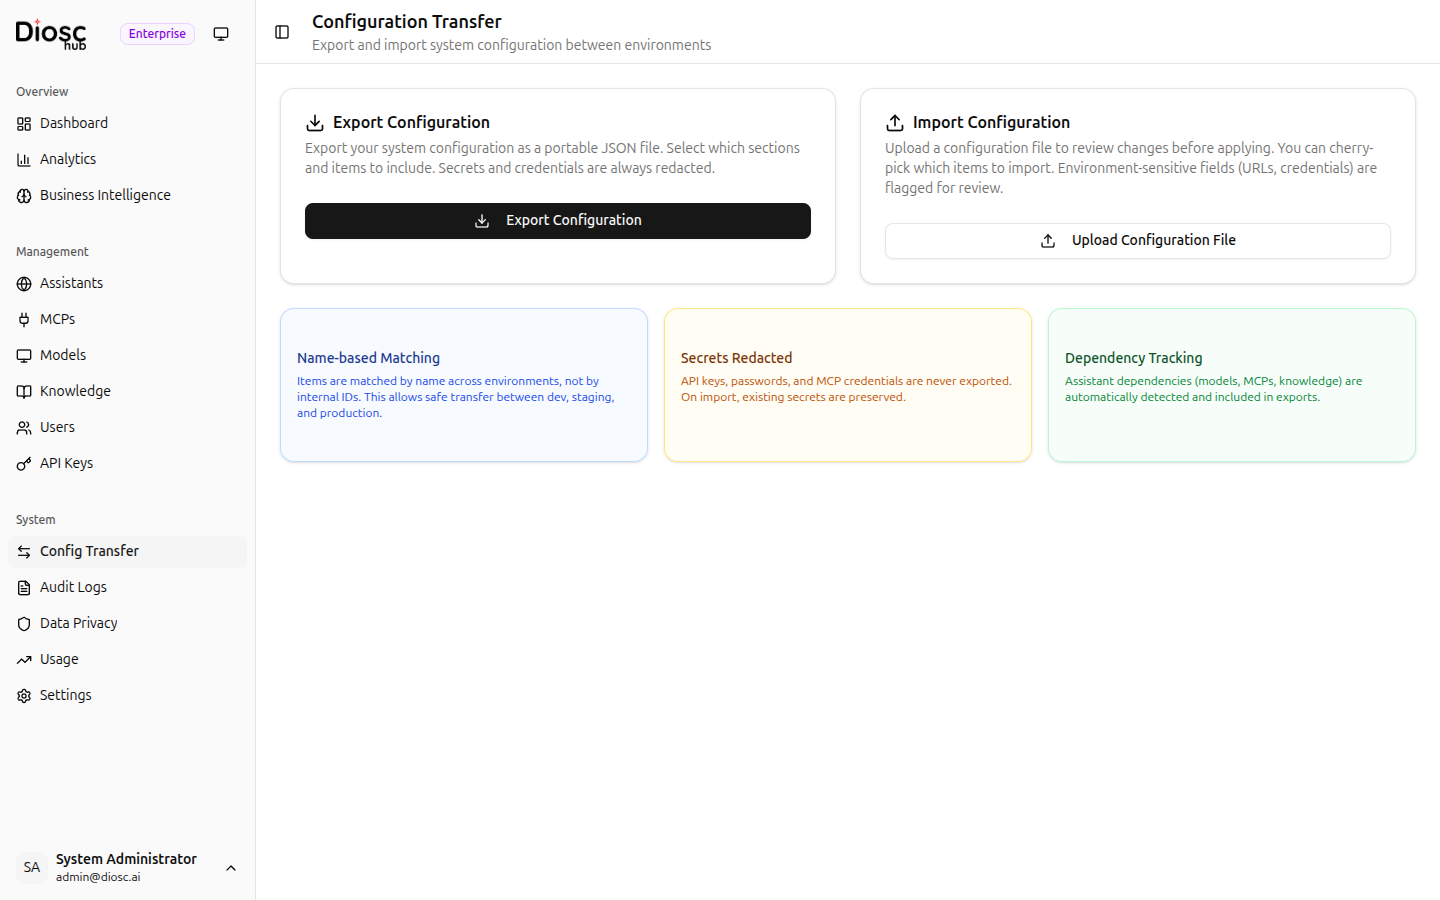
Secrets are never exported. API keys, passwords, and MCP credentials are always redacted. On import, existing secrets in the target environment are preserved.
Export
Click Export Configuration to open the export picker dialog.
Export Picker Dialog
The dialog shows all exportable configuration sections with an item count for each:
| Section | Contents |
|---|---|
| Assistants | AI assistant configurations (settings, system prompt, model, CORS) |
| MCP Instances | MCP server connection settings (name, URL, transport, tags) |
| Models | LLM model catalog entries |
| Knowledge | Knowledge base definitions |
| Templates | Configuration templates |
Selecting items:
- Check or uncheck a section row to include or exclude all its items at once.
- Click the expand arrow (▶) on any section to see individual items and cherry-pick.
- Use Select All / Clear to quickly adjust the full selection.
The left panel shows a running count of selected items and sections.
Dependency Tracking
When assistants are selected, their dependencies — models, MCP instances, and knowledge bases — are automatically detected and included. Dependency items appear with a blue link badge showing which assistant requires them. They cannot be deselected while their dependent assistant is selected.
Downloading the File
Click Export to generate and download a diosc-config-YYYY-MM-DD.json file. This file contains all selected configuration with credentials redacted. It is safe to commit to version control.
Import
Click Upload Configuration File to select a previously exported .json file.
The file is analyzed before any changes are applied. You review the diff and choose exactly what to import.
Import Review Dialog
The review dialog has a left navigation tree listing all sections in the file. Select a section to see its items and their change types:
| Change Type | Meaning | Default |
|---|---|---|
| Add | Item does not exist in the target — will be created | Selected |
| Update | Item exists with different values — will be updated | Selected |
| Delete | Item exists in target but not in source — will be deleted | Deselected |
| Unchanged | Identical in both environments — will be skipped | Deselected |
Cherry-picking: Toggle individual items on or off. For assistants, you can drill into nested sub-configurations (roles, approval policies, sitemap entries) to selectively apply only certain sub-items.
Dependency Warnings
If selected items reference resources that are missing in the target environment, warnings appear in the summary bar at the bottom of the dialog.
Applying the Import
Click Apply in the summary bar to execute the selected changes. A confirmation toast shows counts of added, updated, and deleted items. Any errors are listed with their section and item context.
Key Behaviors
Name-Based Matching
Items are matched by name across environments, not by internal UUIDs. An assistant named HR Assistant in dev maps to HR Assistant in production, regardless of database ID differences. This makes transfers safe across independently provisioned environments.
Secrets Redacted
Credentials are stripped on export:
- MCP server API keys and auth tokens
- LLM provider API keys
- Any field classified as a secret in the schema
After import, you must re-enter credentials in the target environment via the relevant settings pages.
Idempotent Imports
Running the same import file twice produces the same result. Items already up to date are classified as unchanged and skipped.
Typical Workflow
Promoting Dev → Production
- In dev, go to Configuration Transfer → Export Configuration
- Select assistants to export; their model, MCP, and knowledge dependencies are auto-included
- Download the file and commit it to your repo (e.g.
config/prod-2026-03-27.json) - In production, go to Configuration Transfer → Upload Configuration File
- Review the diff — verify add/update items are correct, toggle off anything unwanted
- Click Apply
- Re-enter MCP credentials and API keys in the production environment
Next Steps
- Assistants — Configure exported assistants
- MCP Servers — Re-enter MCP credentials after import
- Audit Logs — Import operations are recorded in the audit log